LMS CCT 37071: Part 12

130721 NVR 023

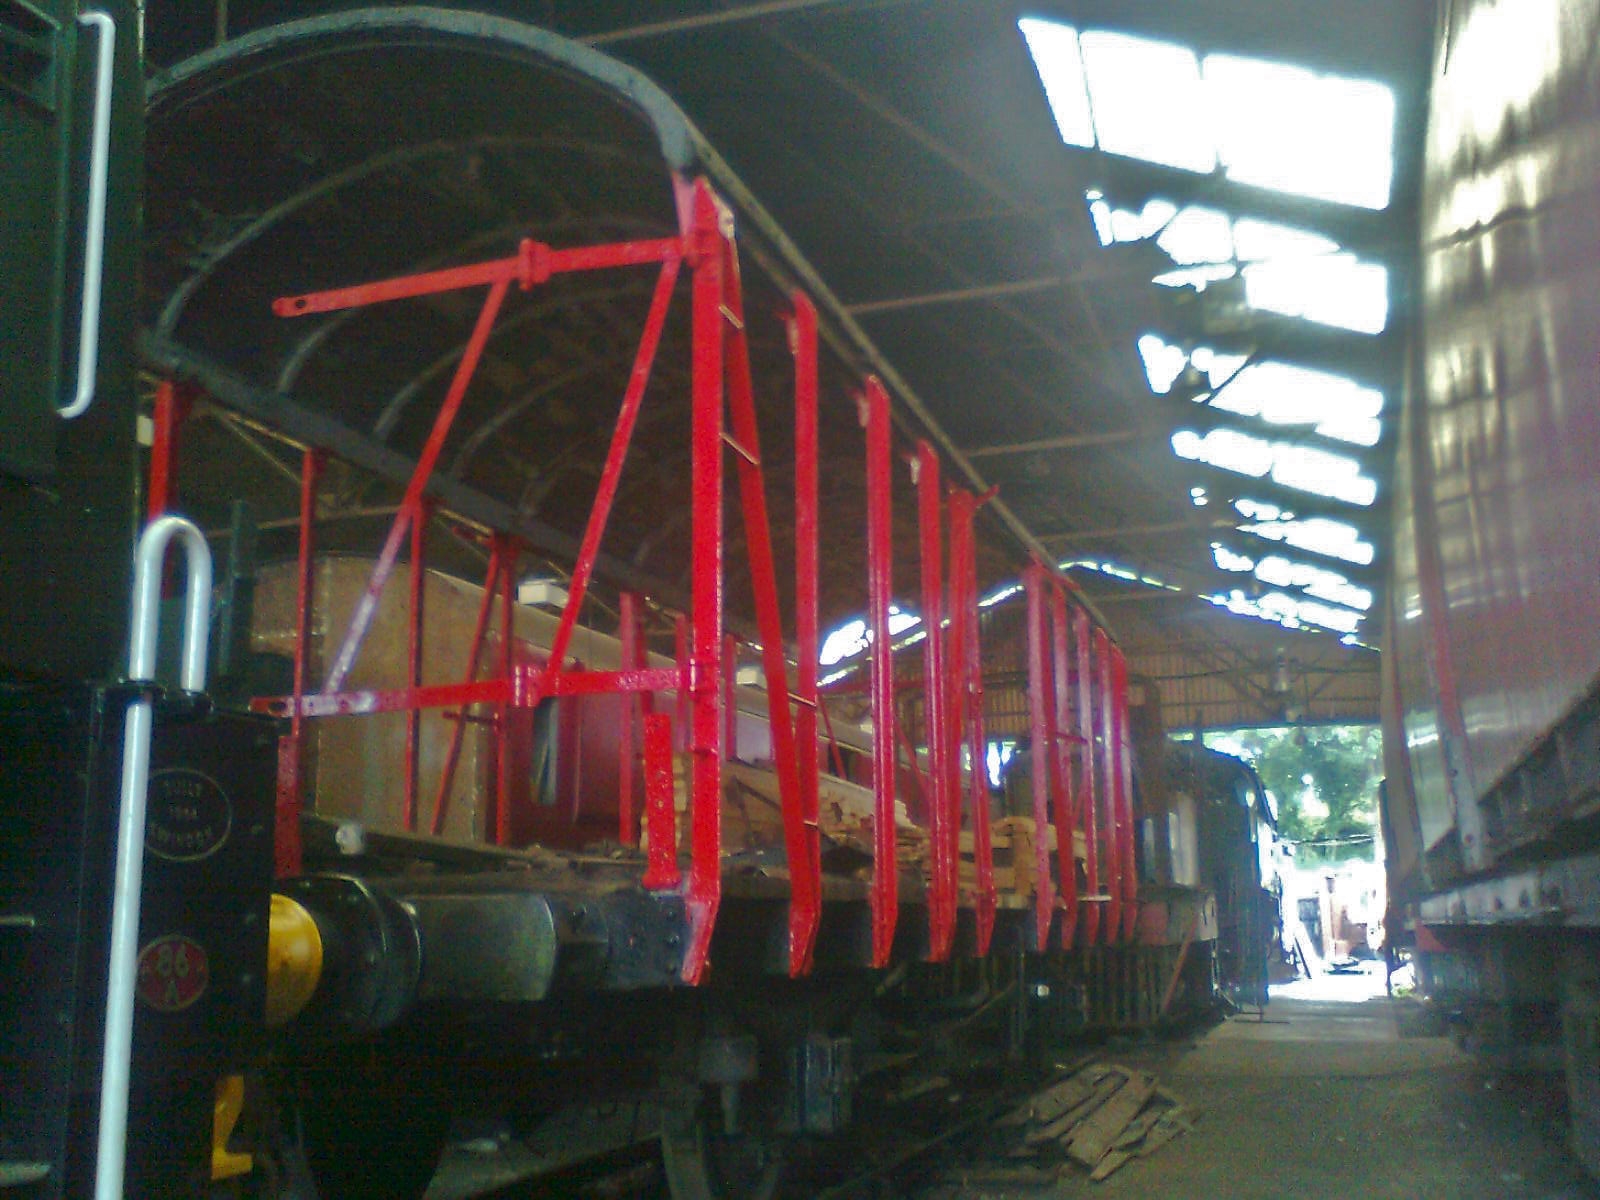
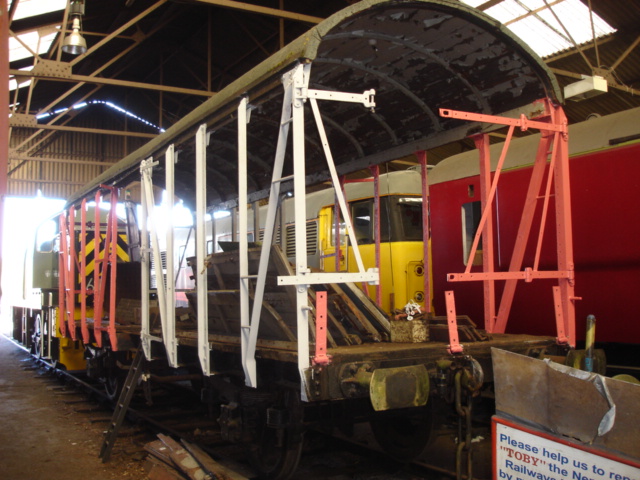
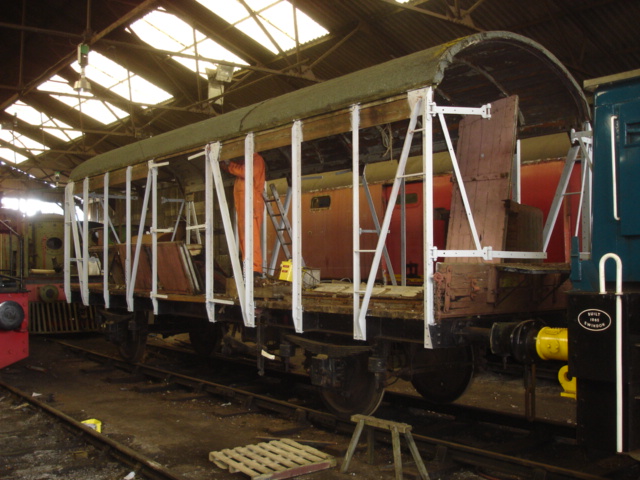
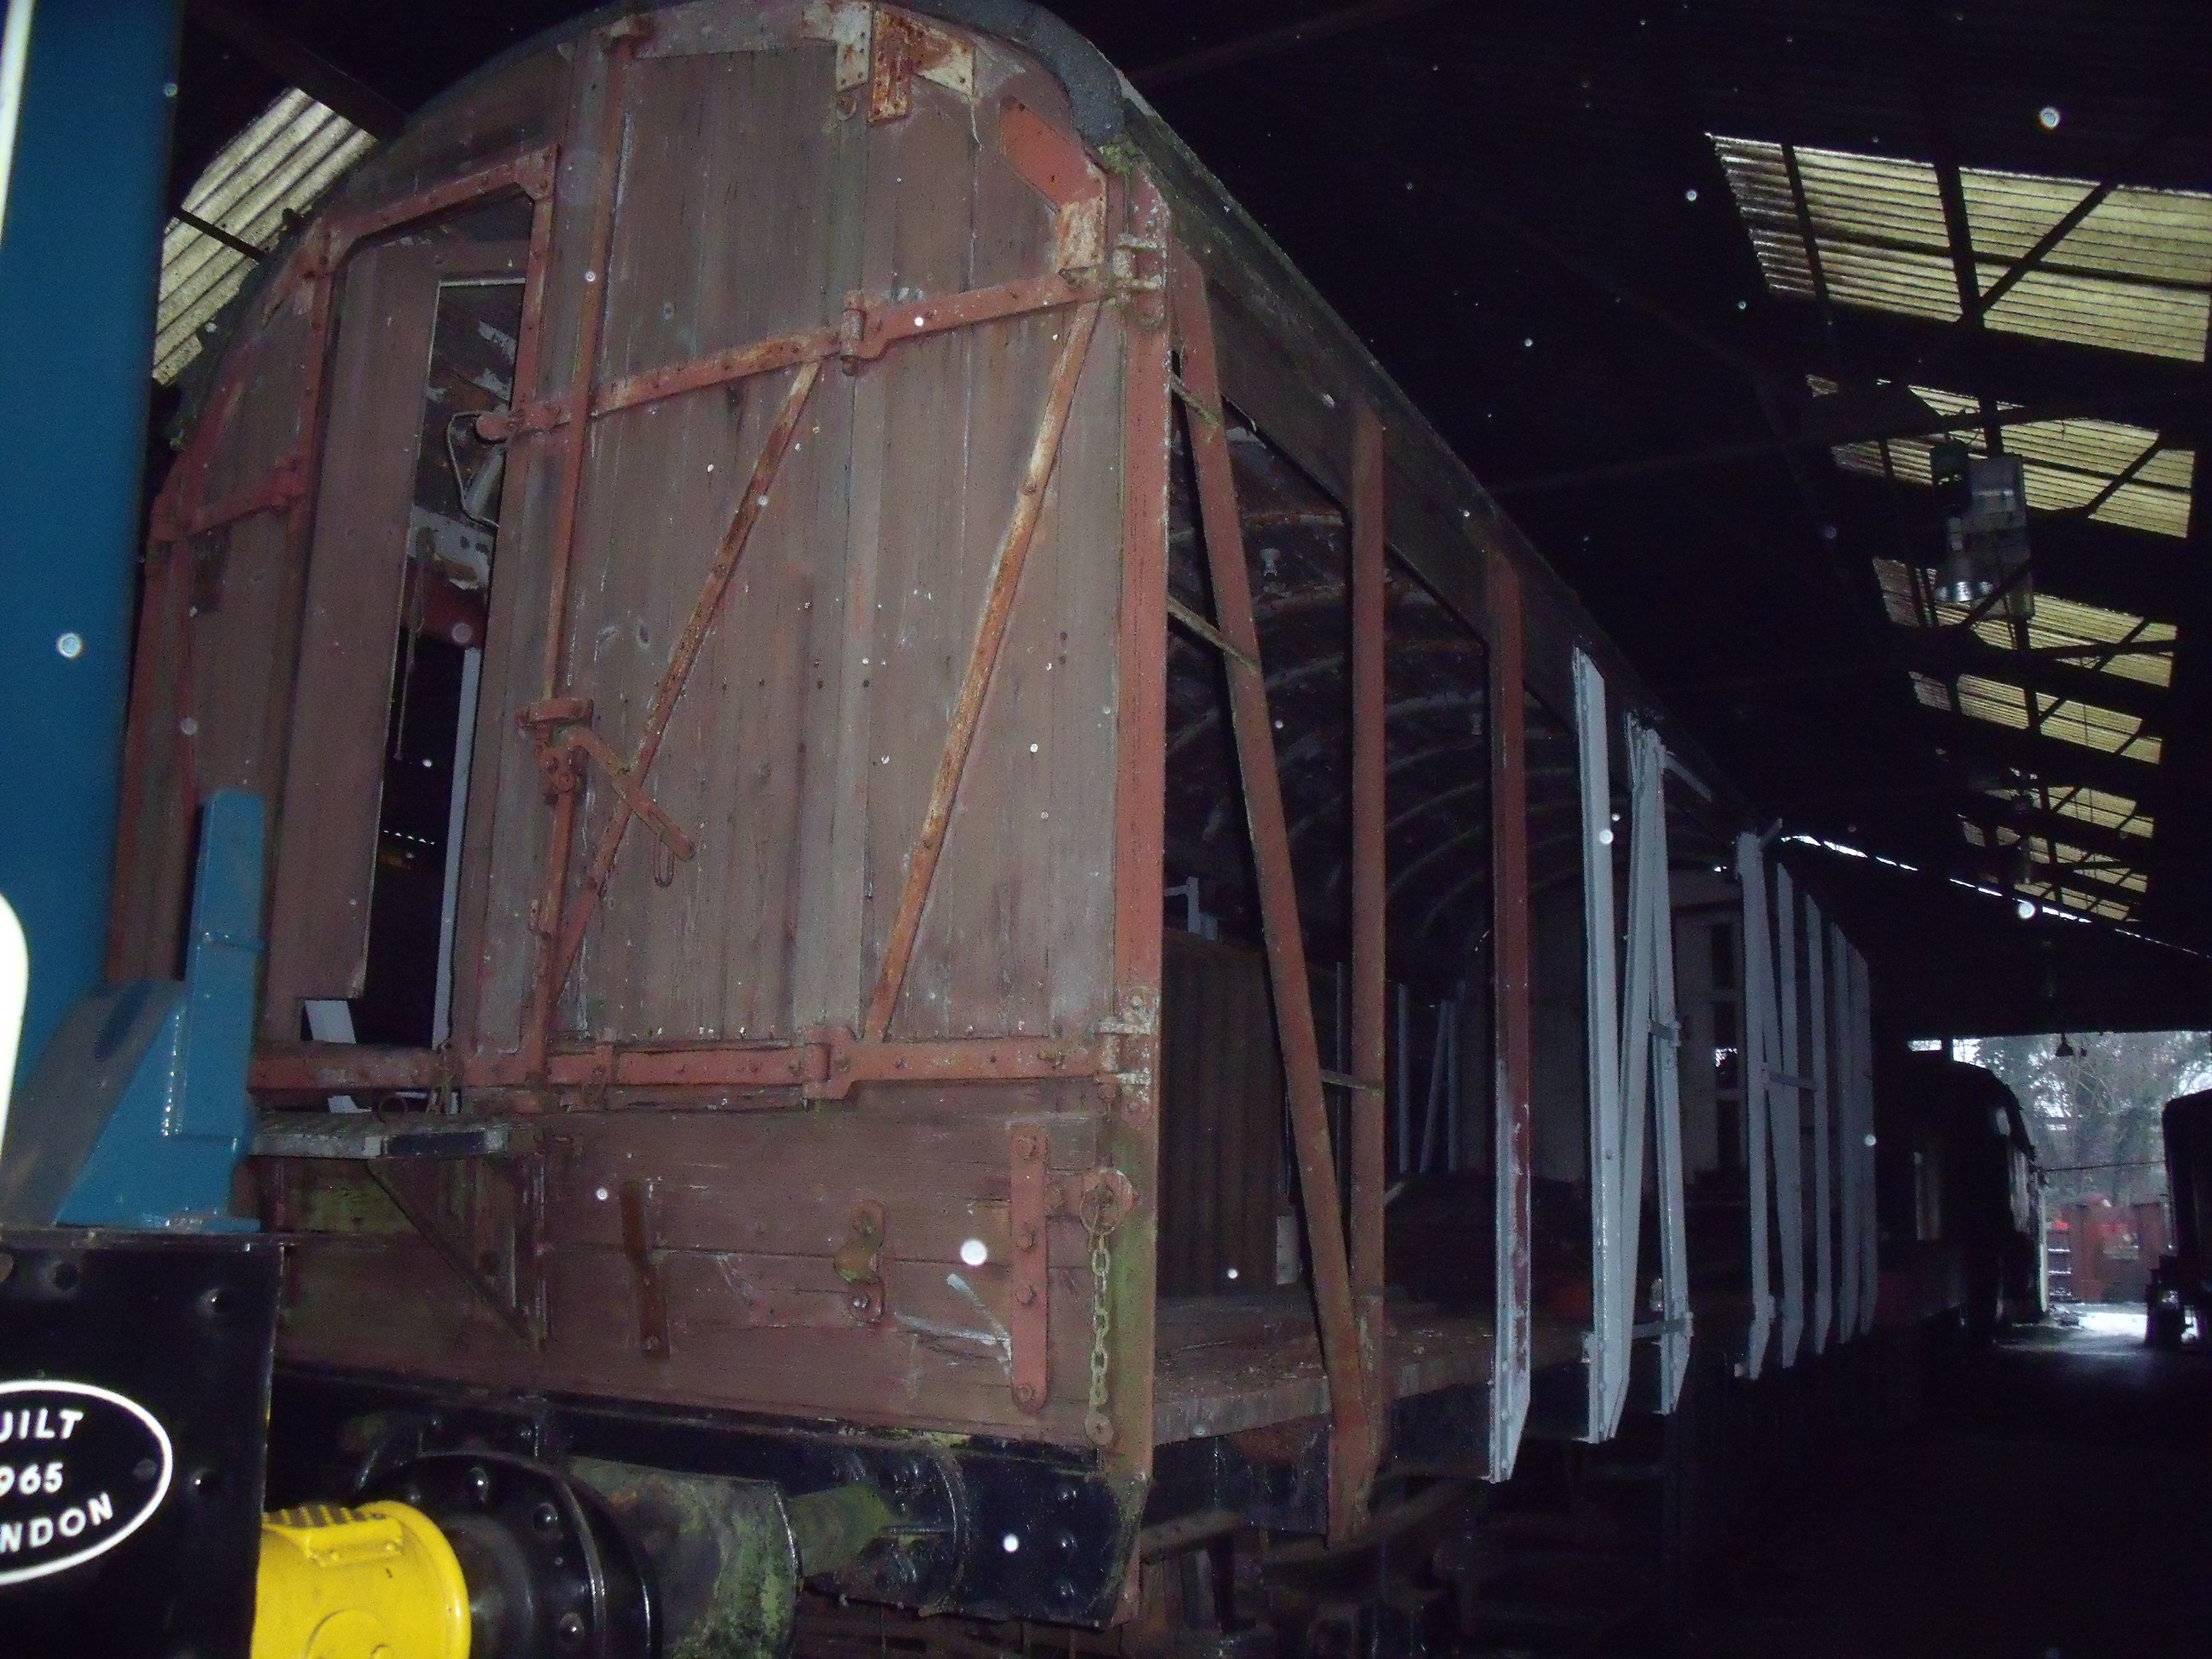
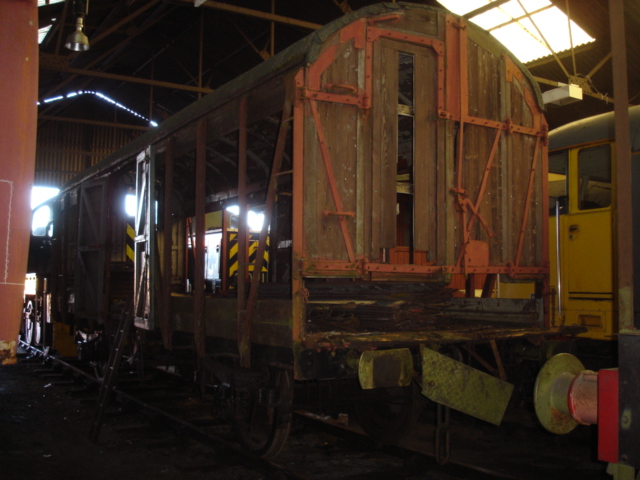
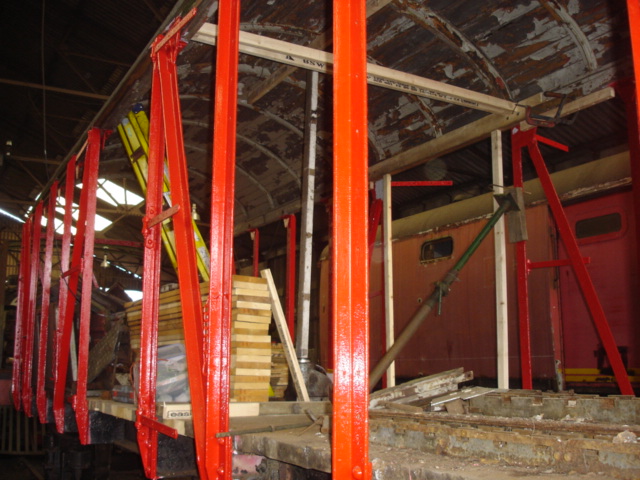
A bit of a tricky task this week; putting right damage on CCT 37071 that was received in a collision many years ago. In the photo it can be seen that the timber top rail is completely smashed. Less obvious is that the steel stanchion is pushed inwards considerably, and that this section of the roof had dropped slightly. As this timber is helping to hold the roof up, it is important we repair it and make it as solid as possible. Perhaps it is just as well that this wagon was always intended to be used in a non-operational role.


130721 NVR 029

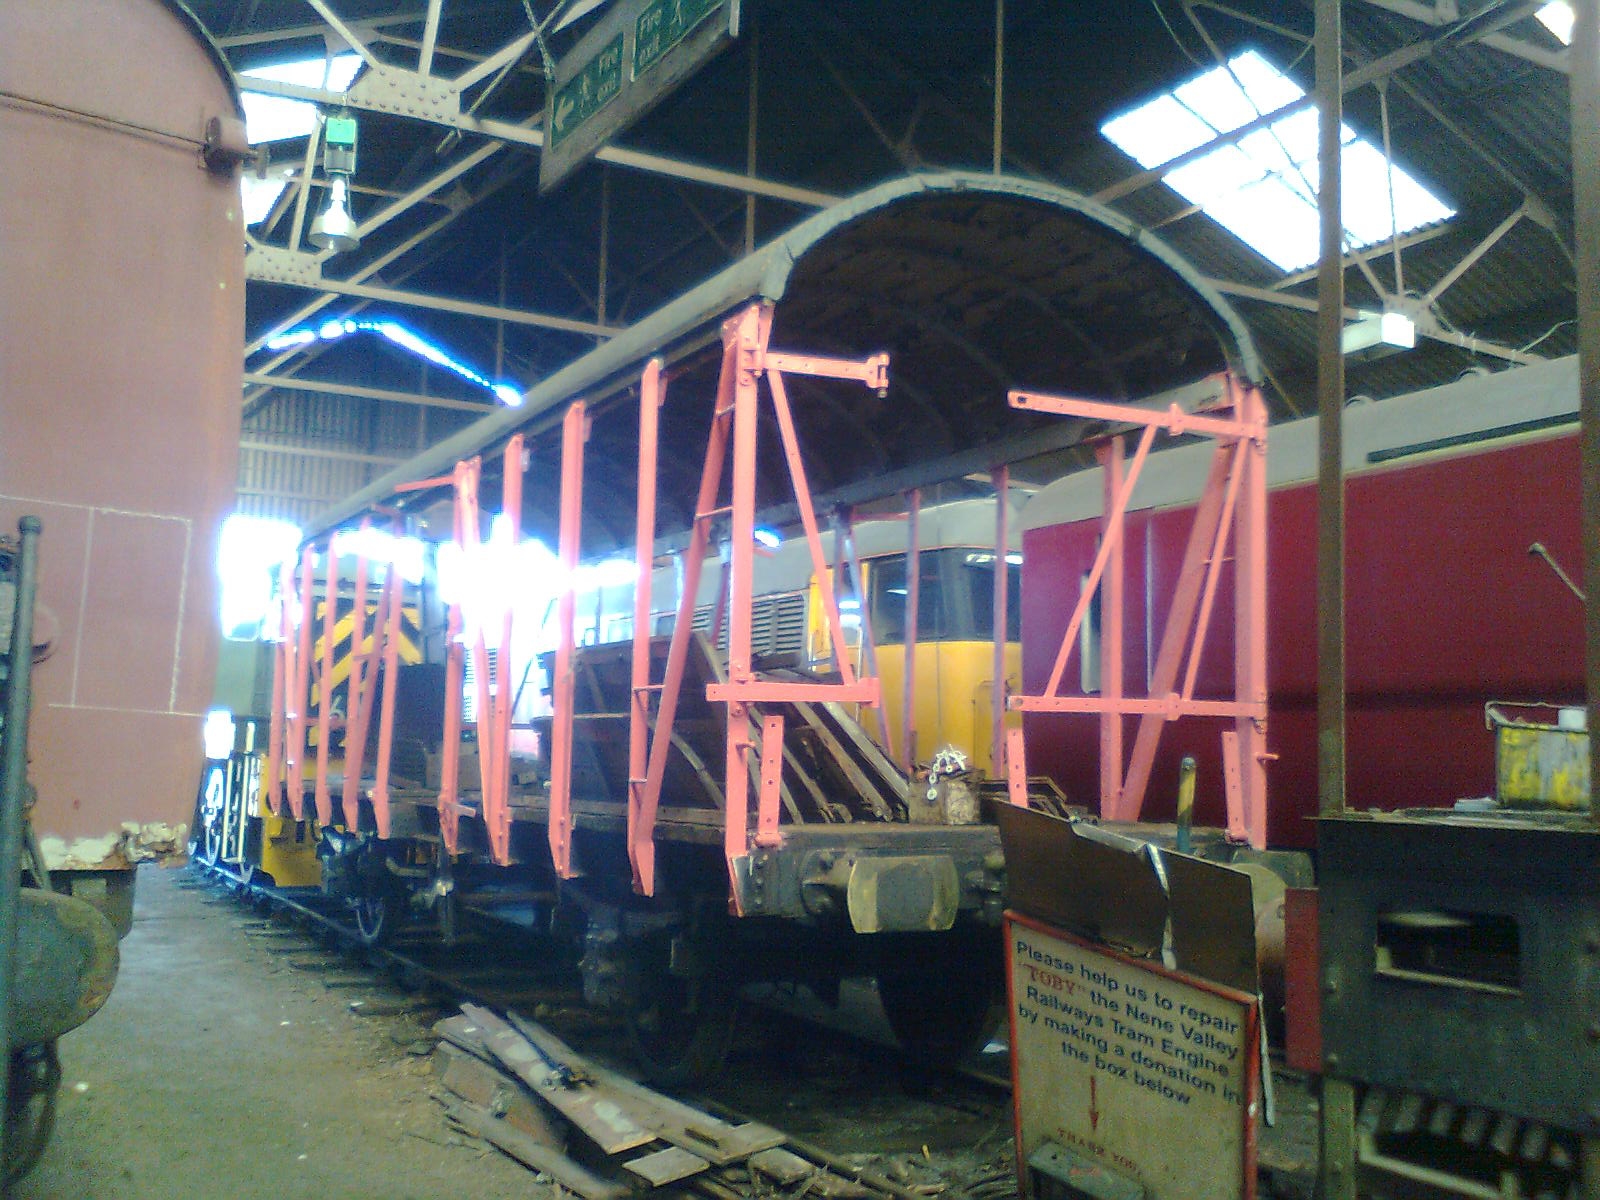
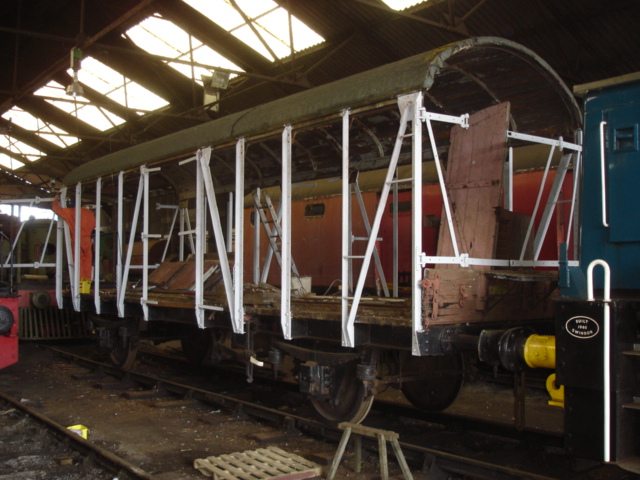
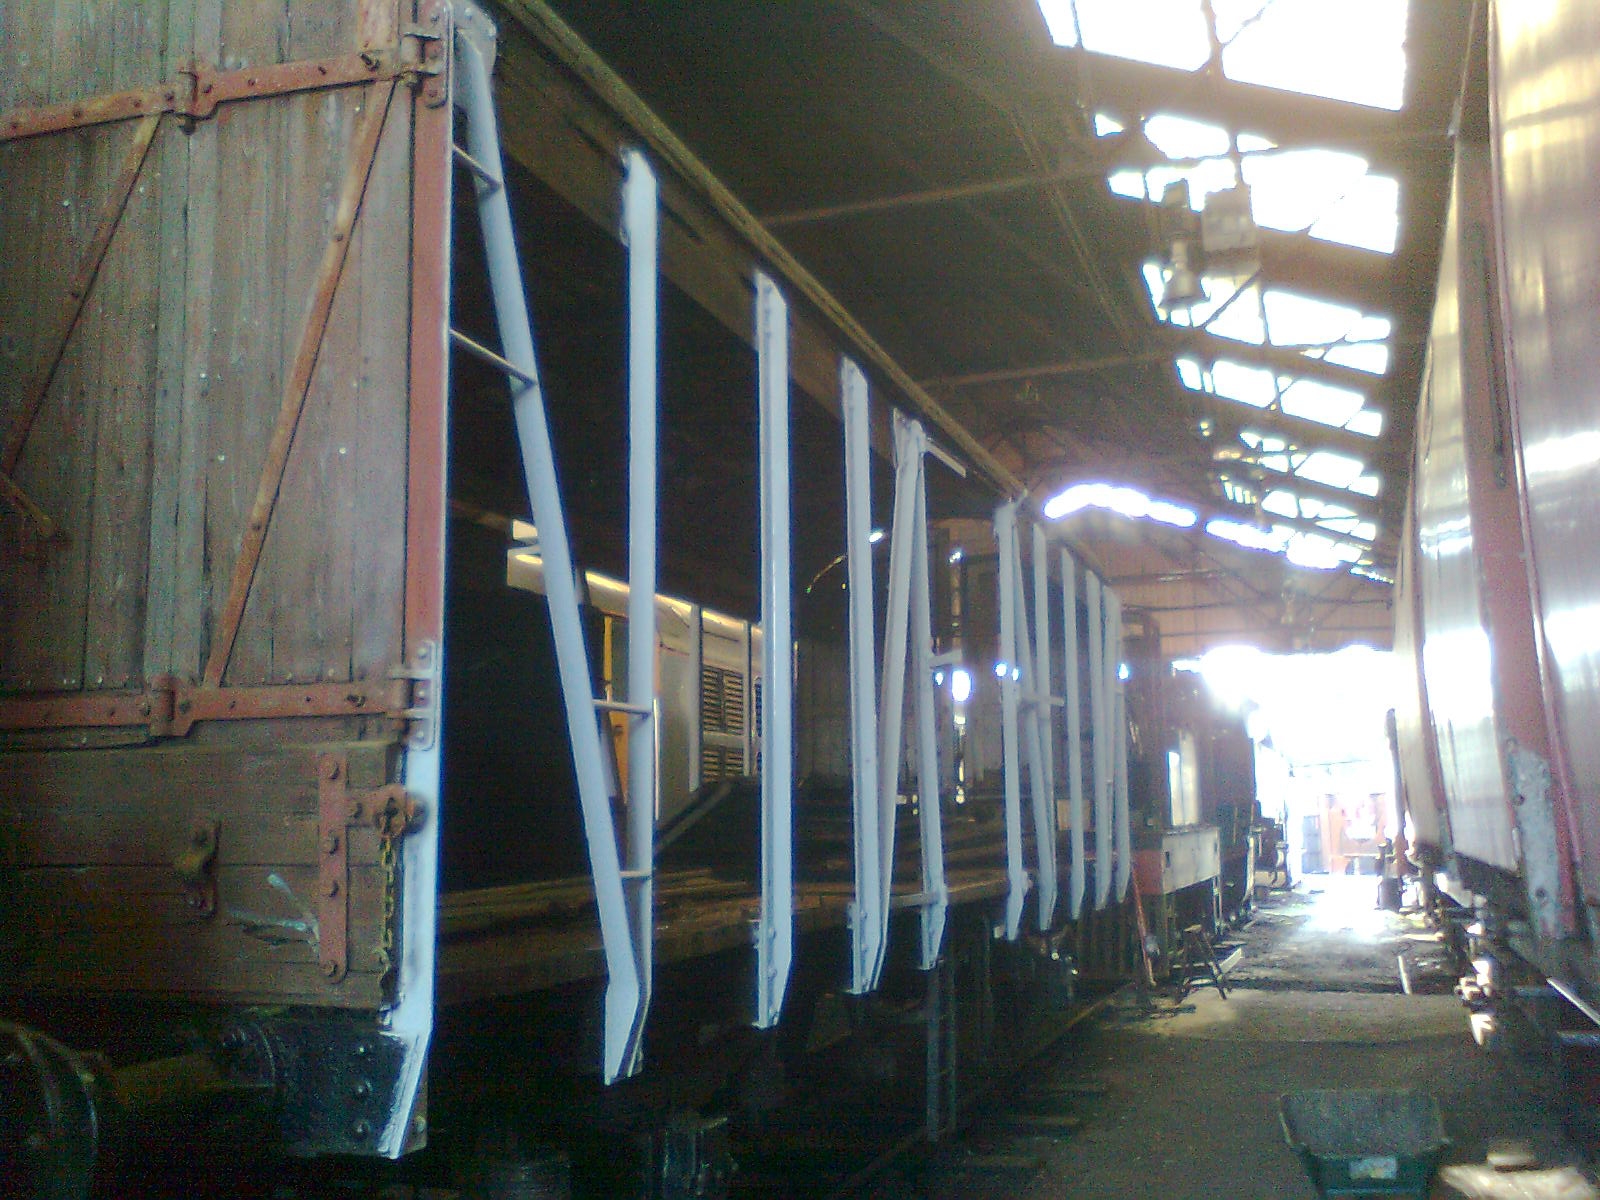
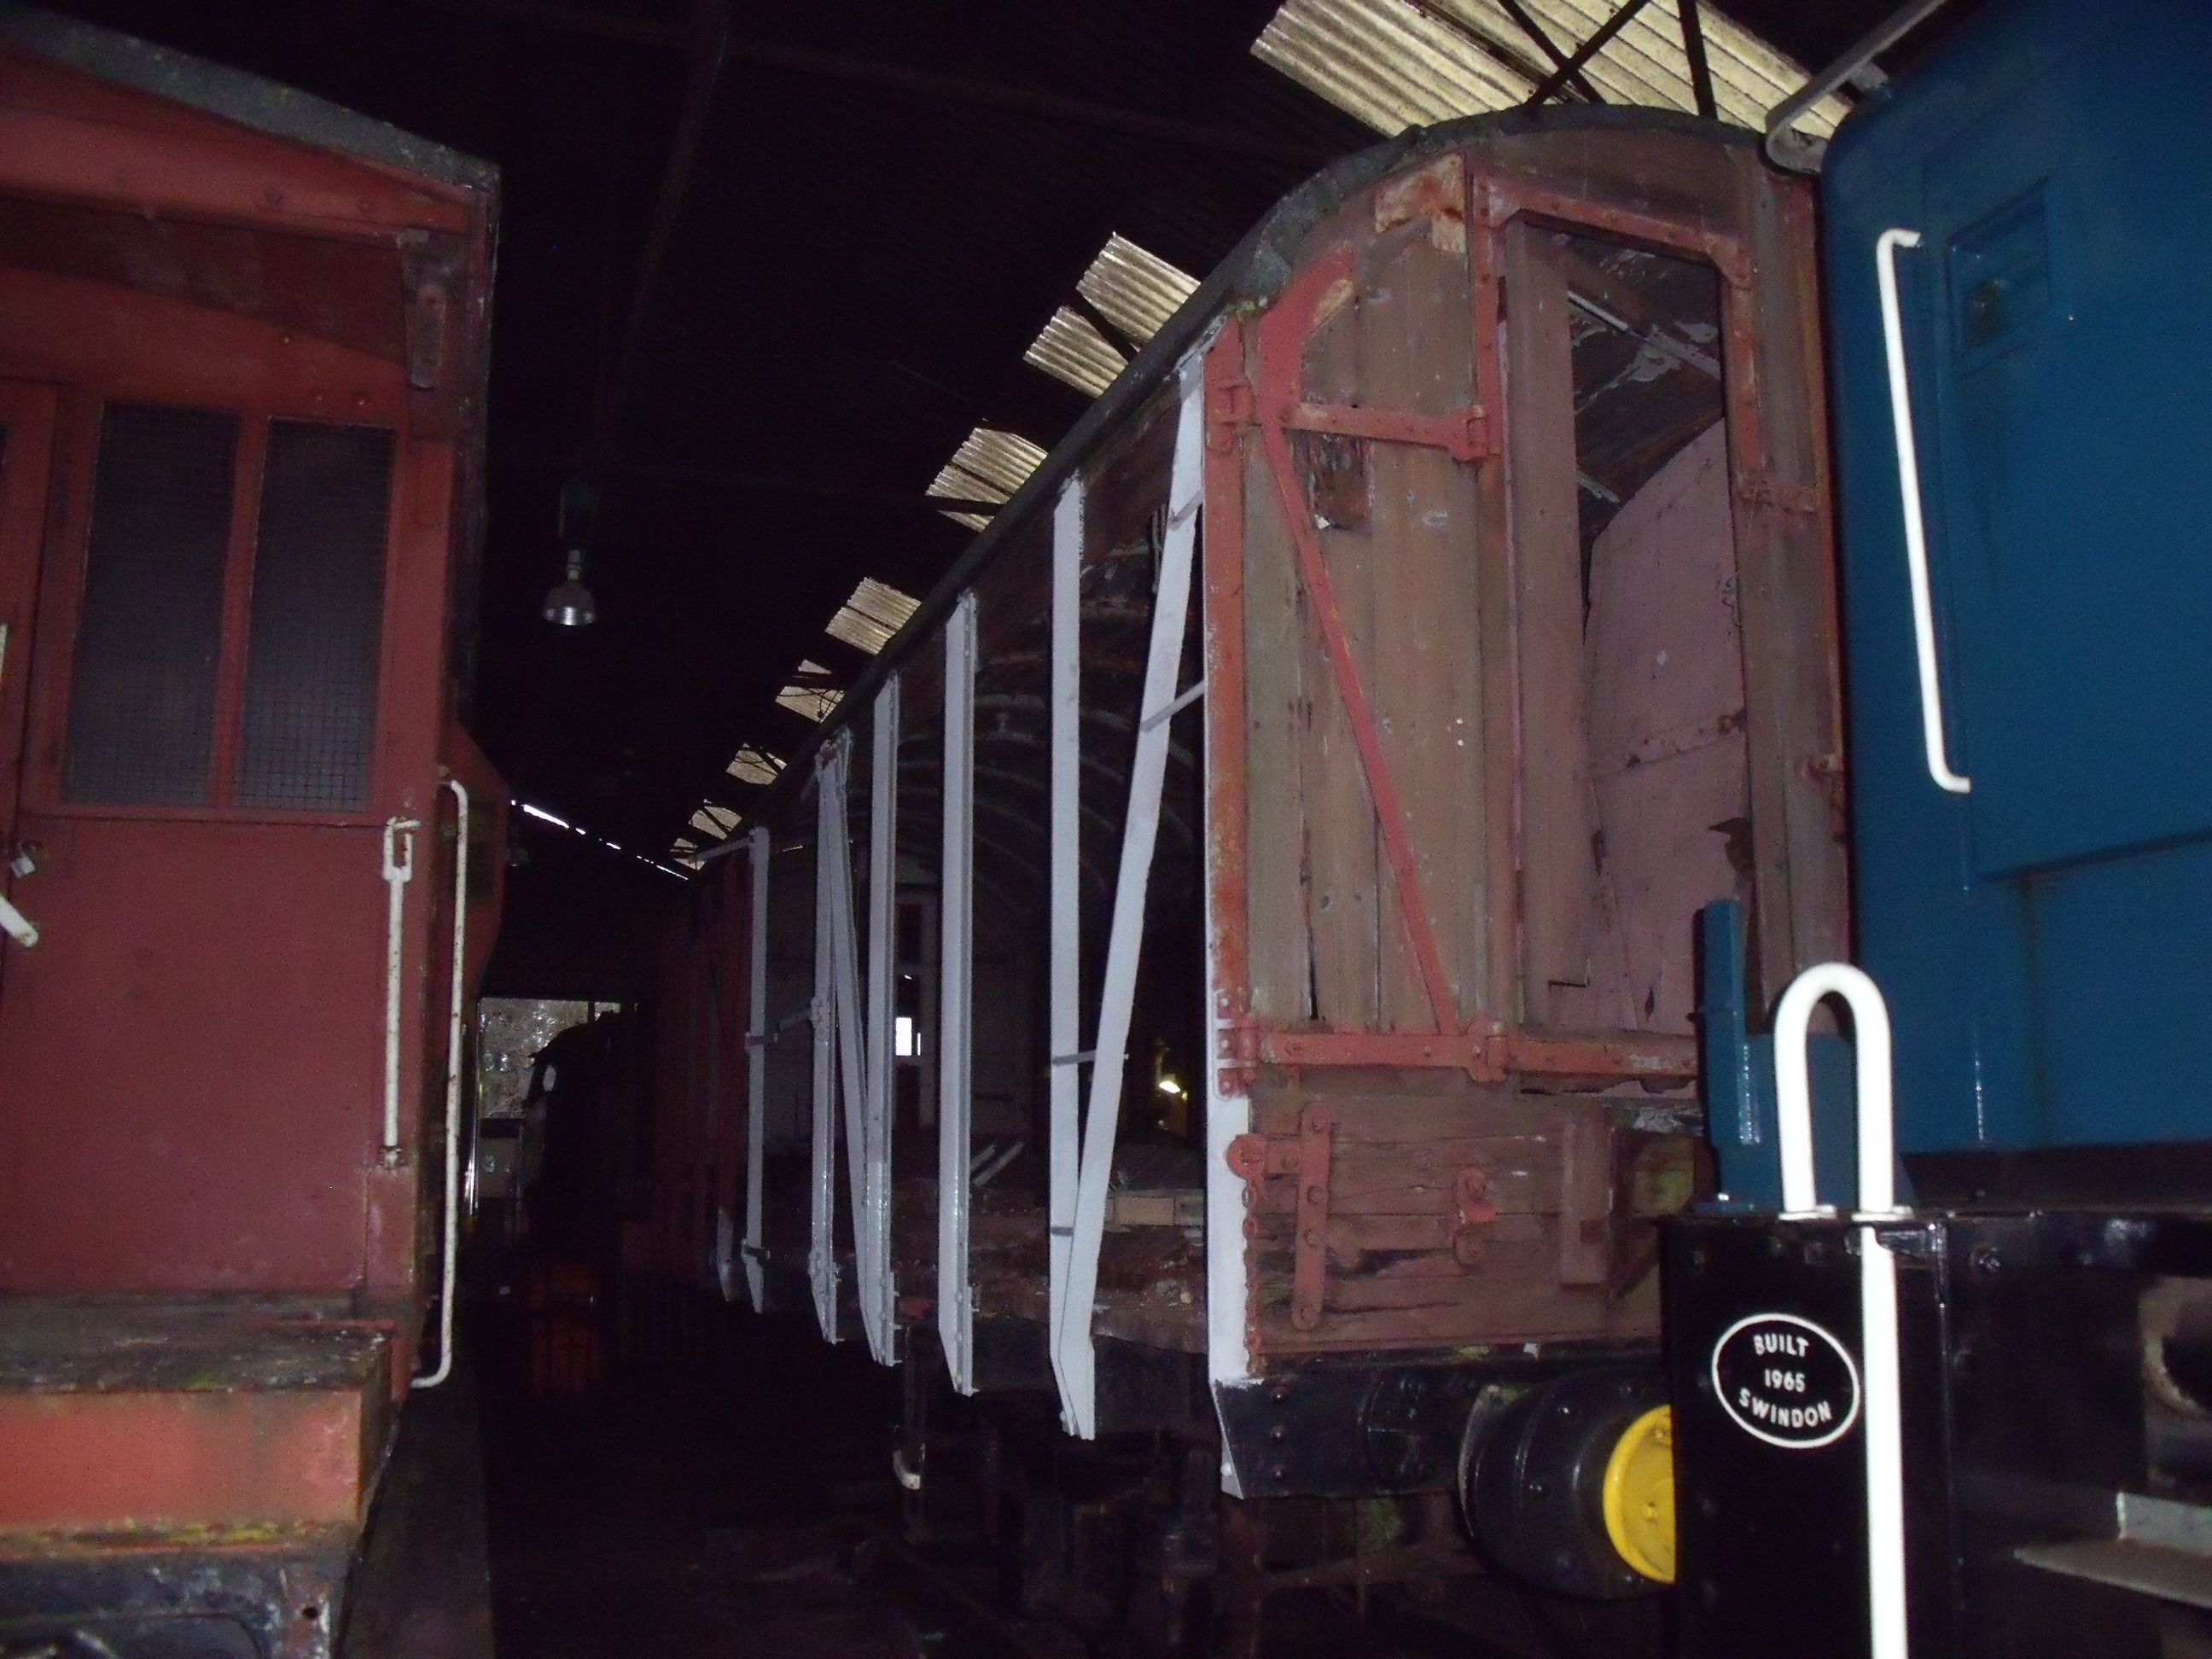
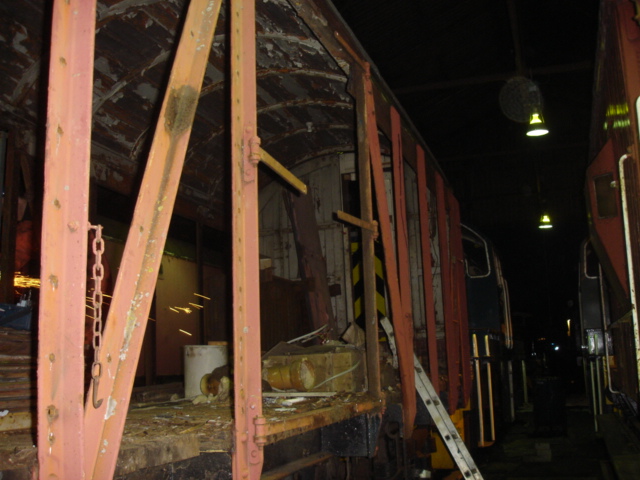
The roof was jacked up slightly, and the steel stanchion was forced back outwards and into its correct alignment by judicious use of packing timbers and an Acro-prop. On the left can be seen a brace running across the van helping push the wall outwards, this will become the top rail of a necessary (but very conveniently located) partition wall to the interior of the van.


130721 NVR 031

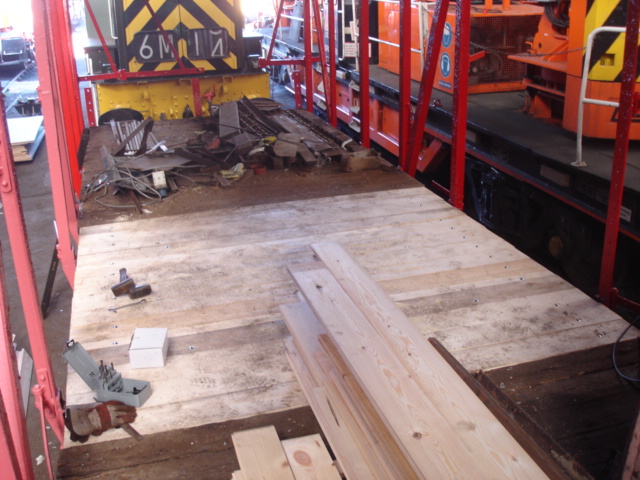
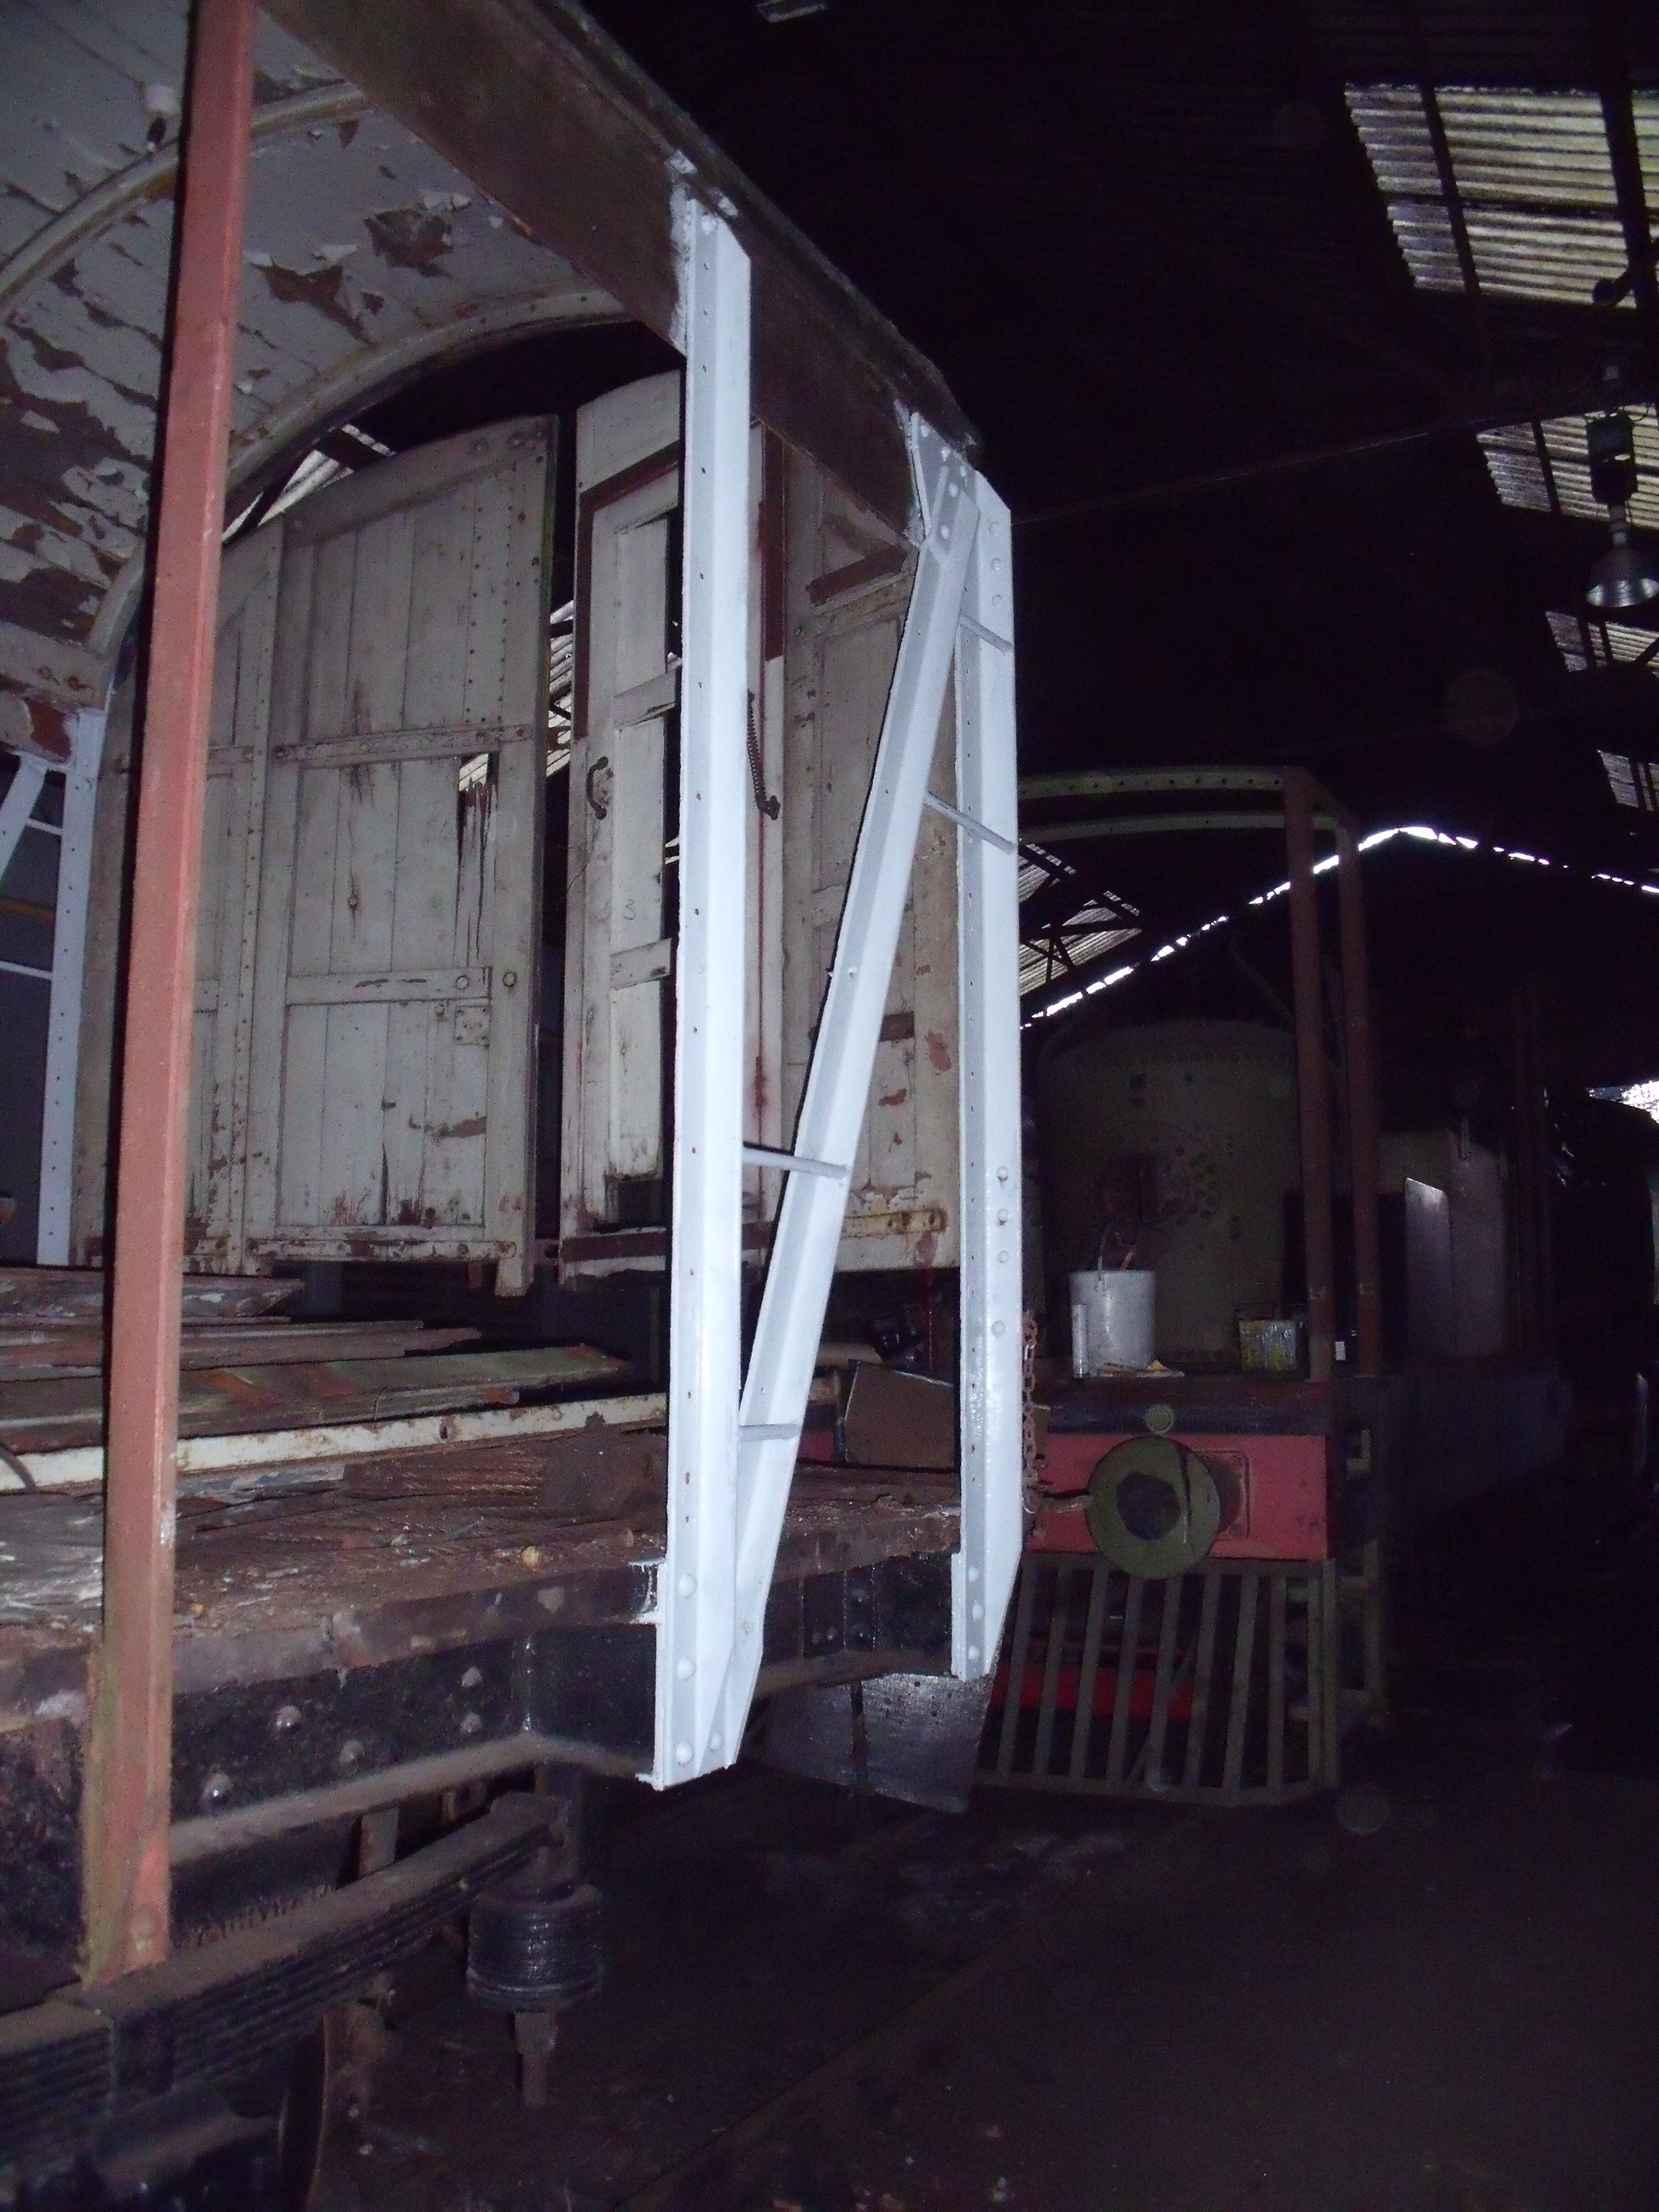
A closer view of the cut-out joint between the old and new timber rail, with the bolts temporarily located to hold the new timber in place. The steel angle and clamp on the right was used to pull the new timber into alignment with the old.


130721 NVR 027

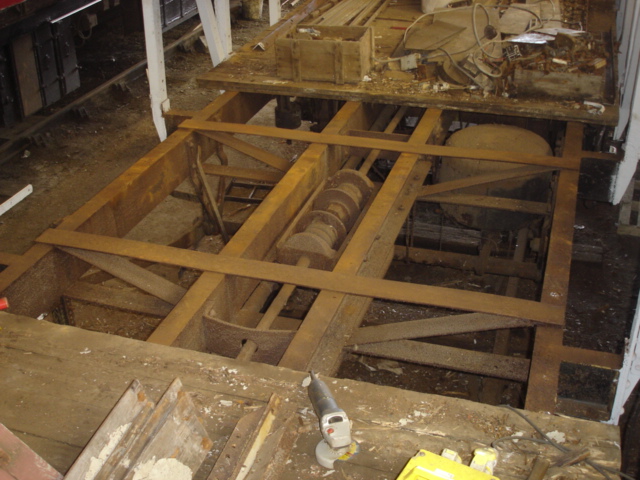
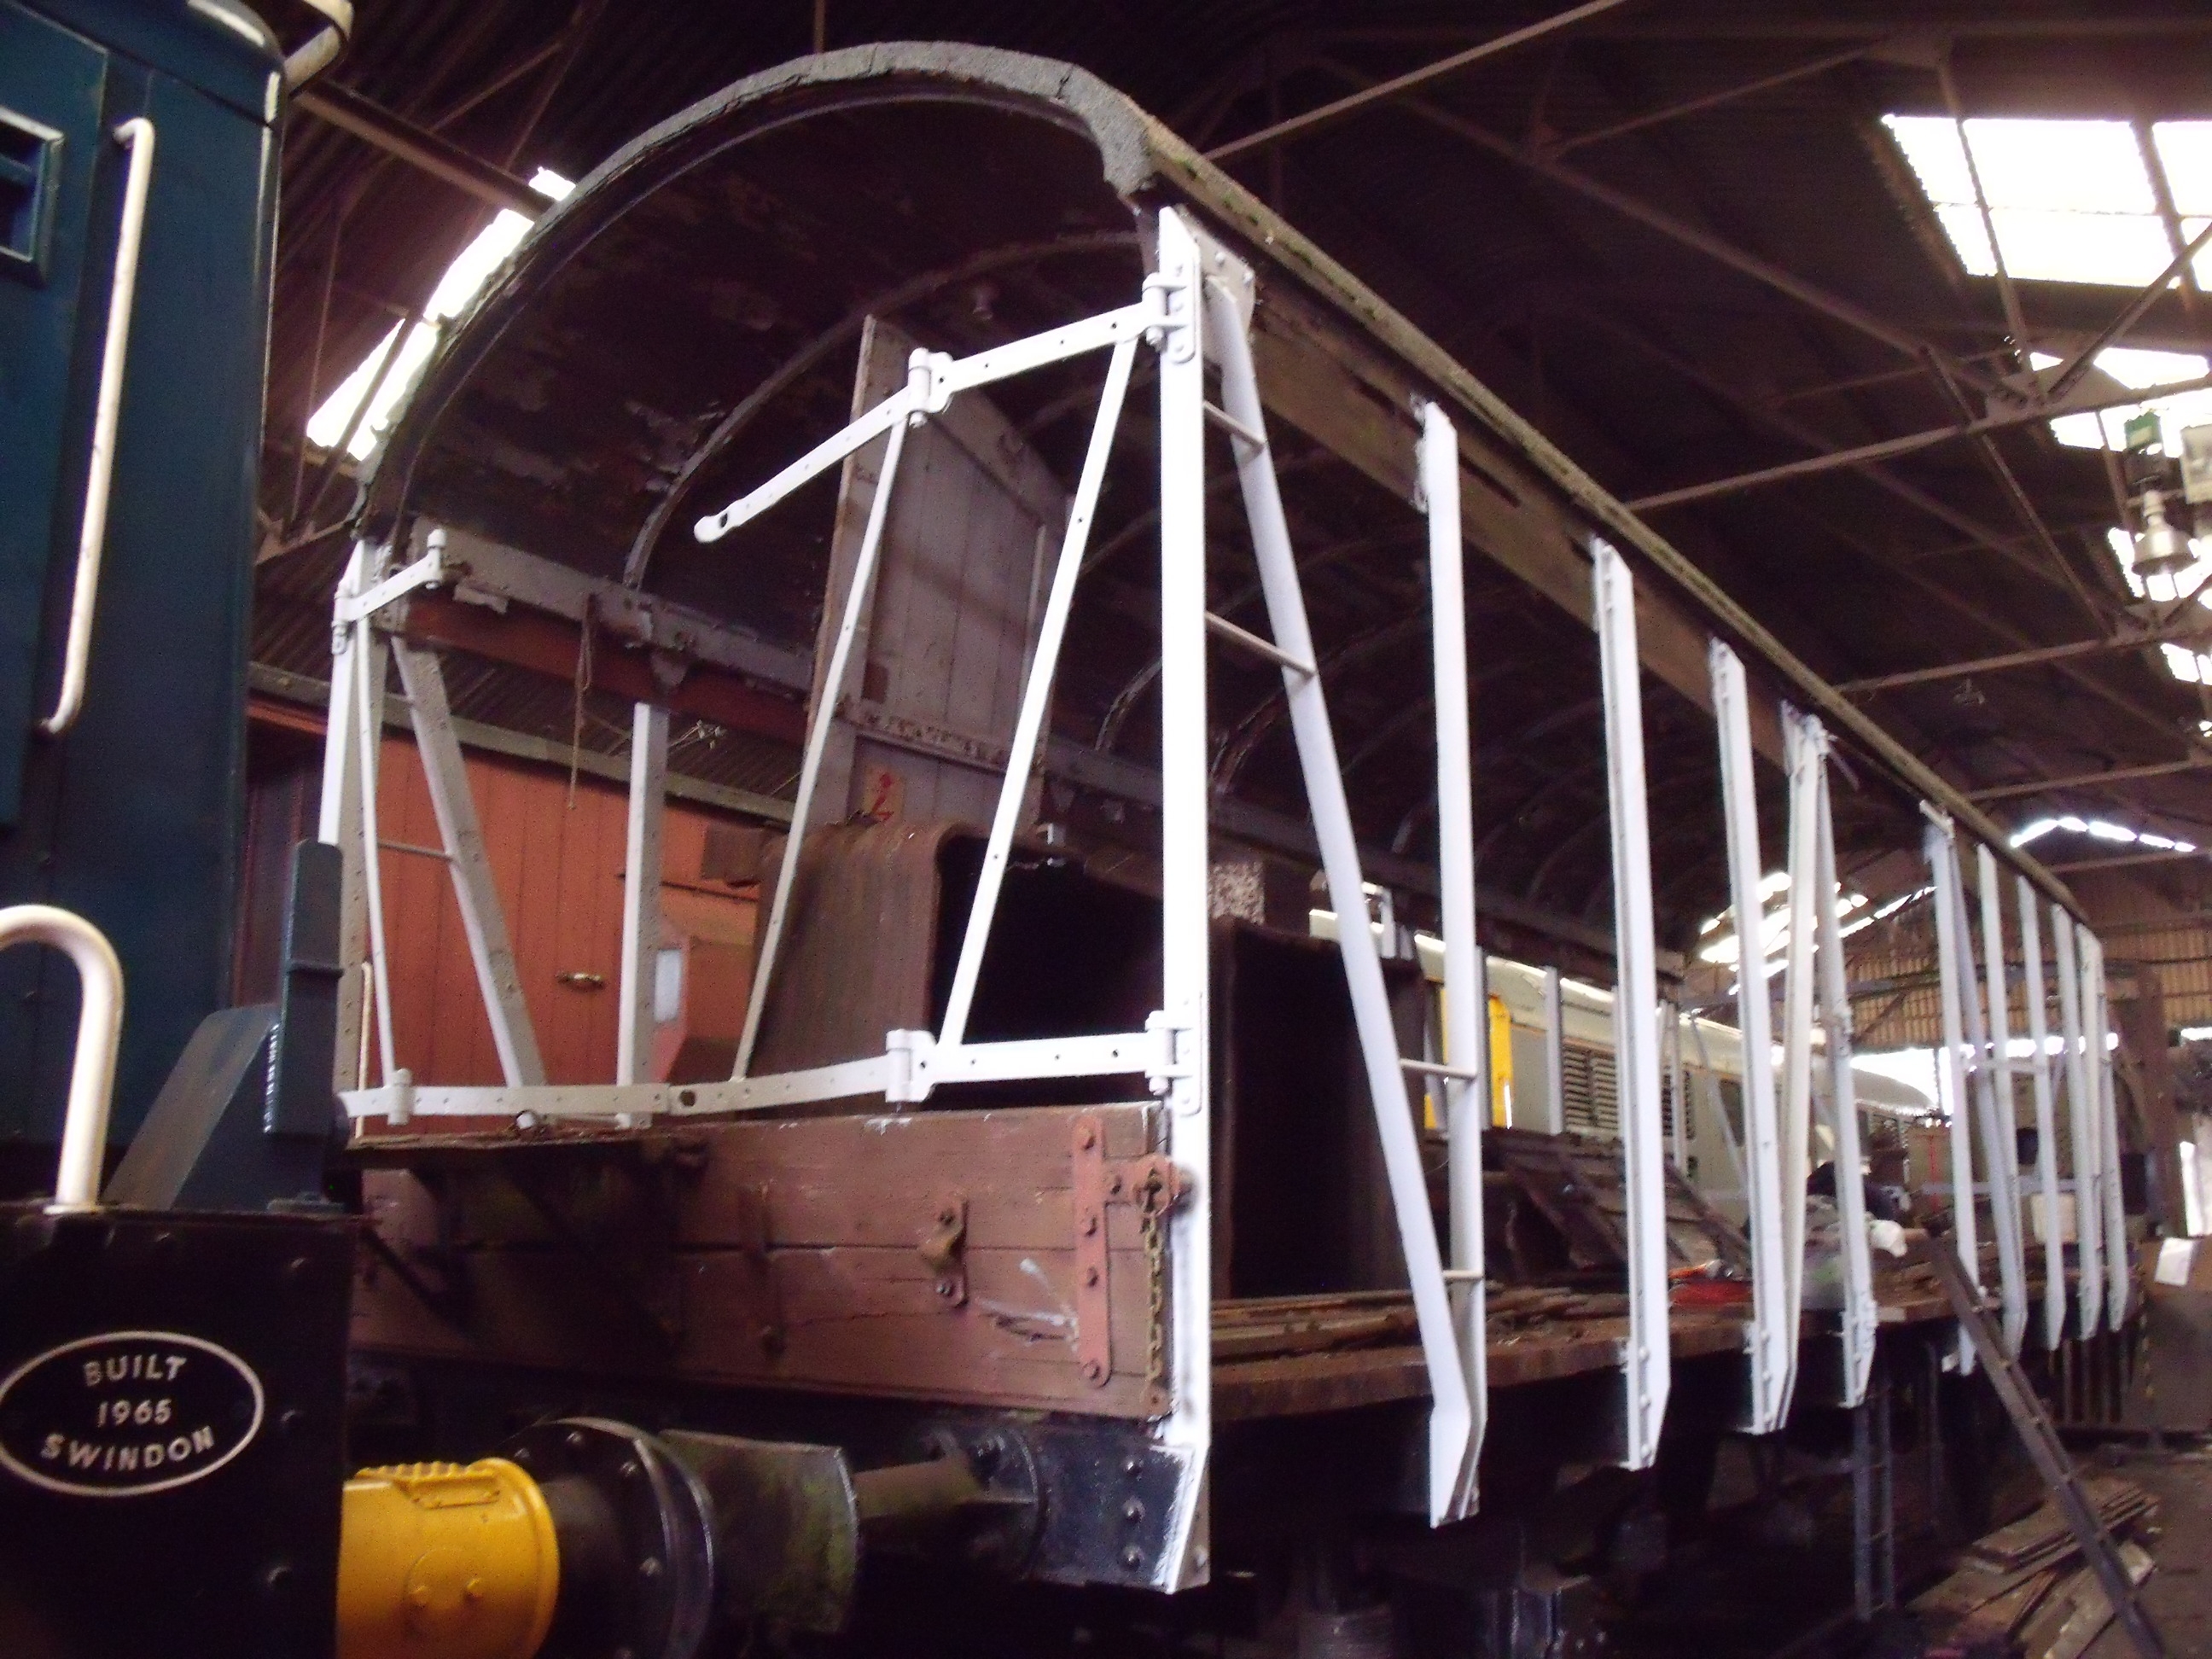
The far set of doors (just behind the diagonal Acro-prop) will be blanked off, to allow a substantial support structure to be constructed under the new section of top rail within the van and thus making this weak spot as robust as possible. The blank section will be covered with a set of dummy doors, so the exterior of the van will look exactly as it should.


130721 NVR 030

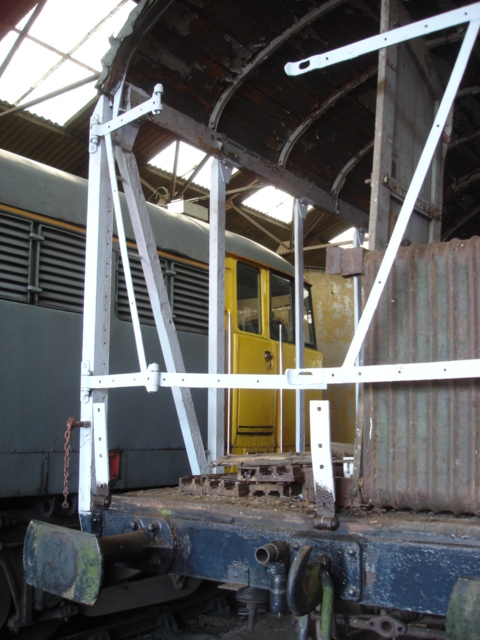
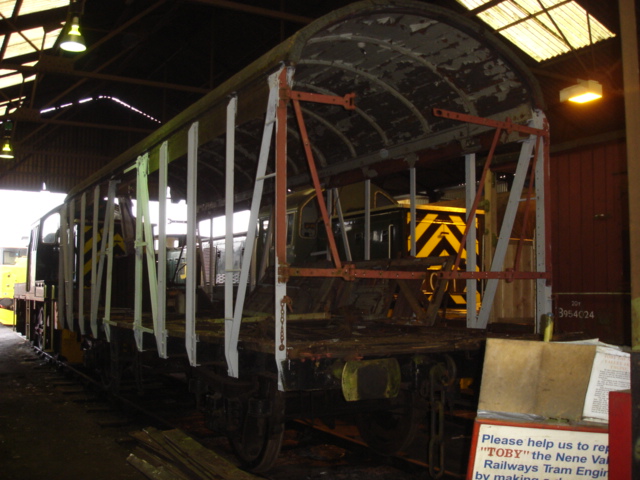
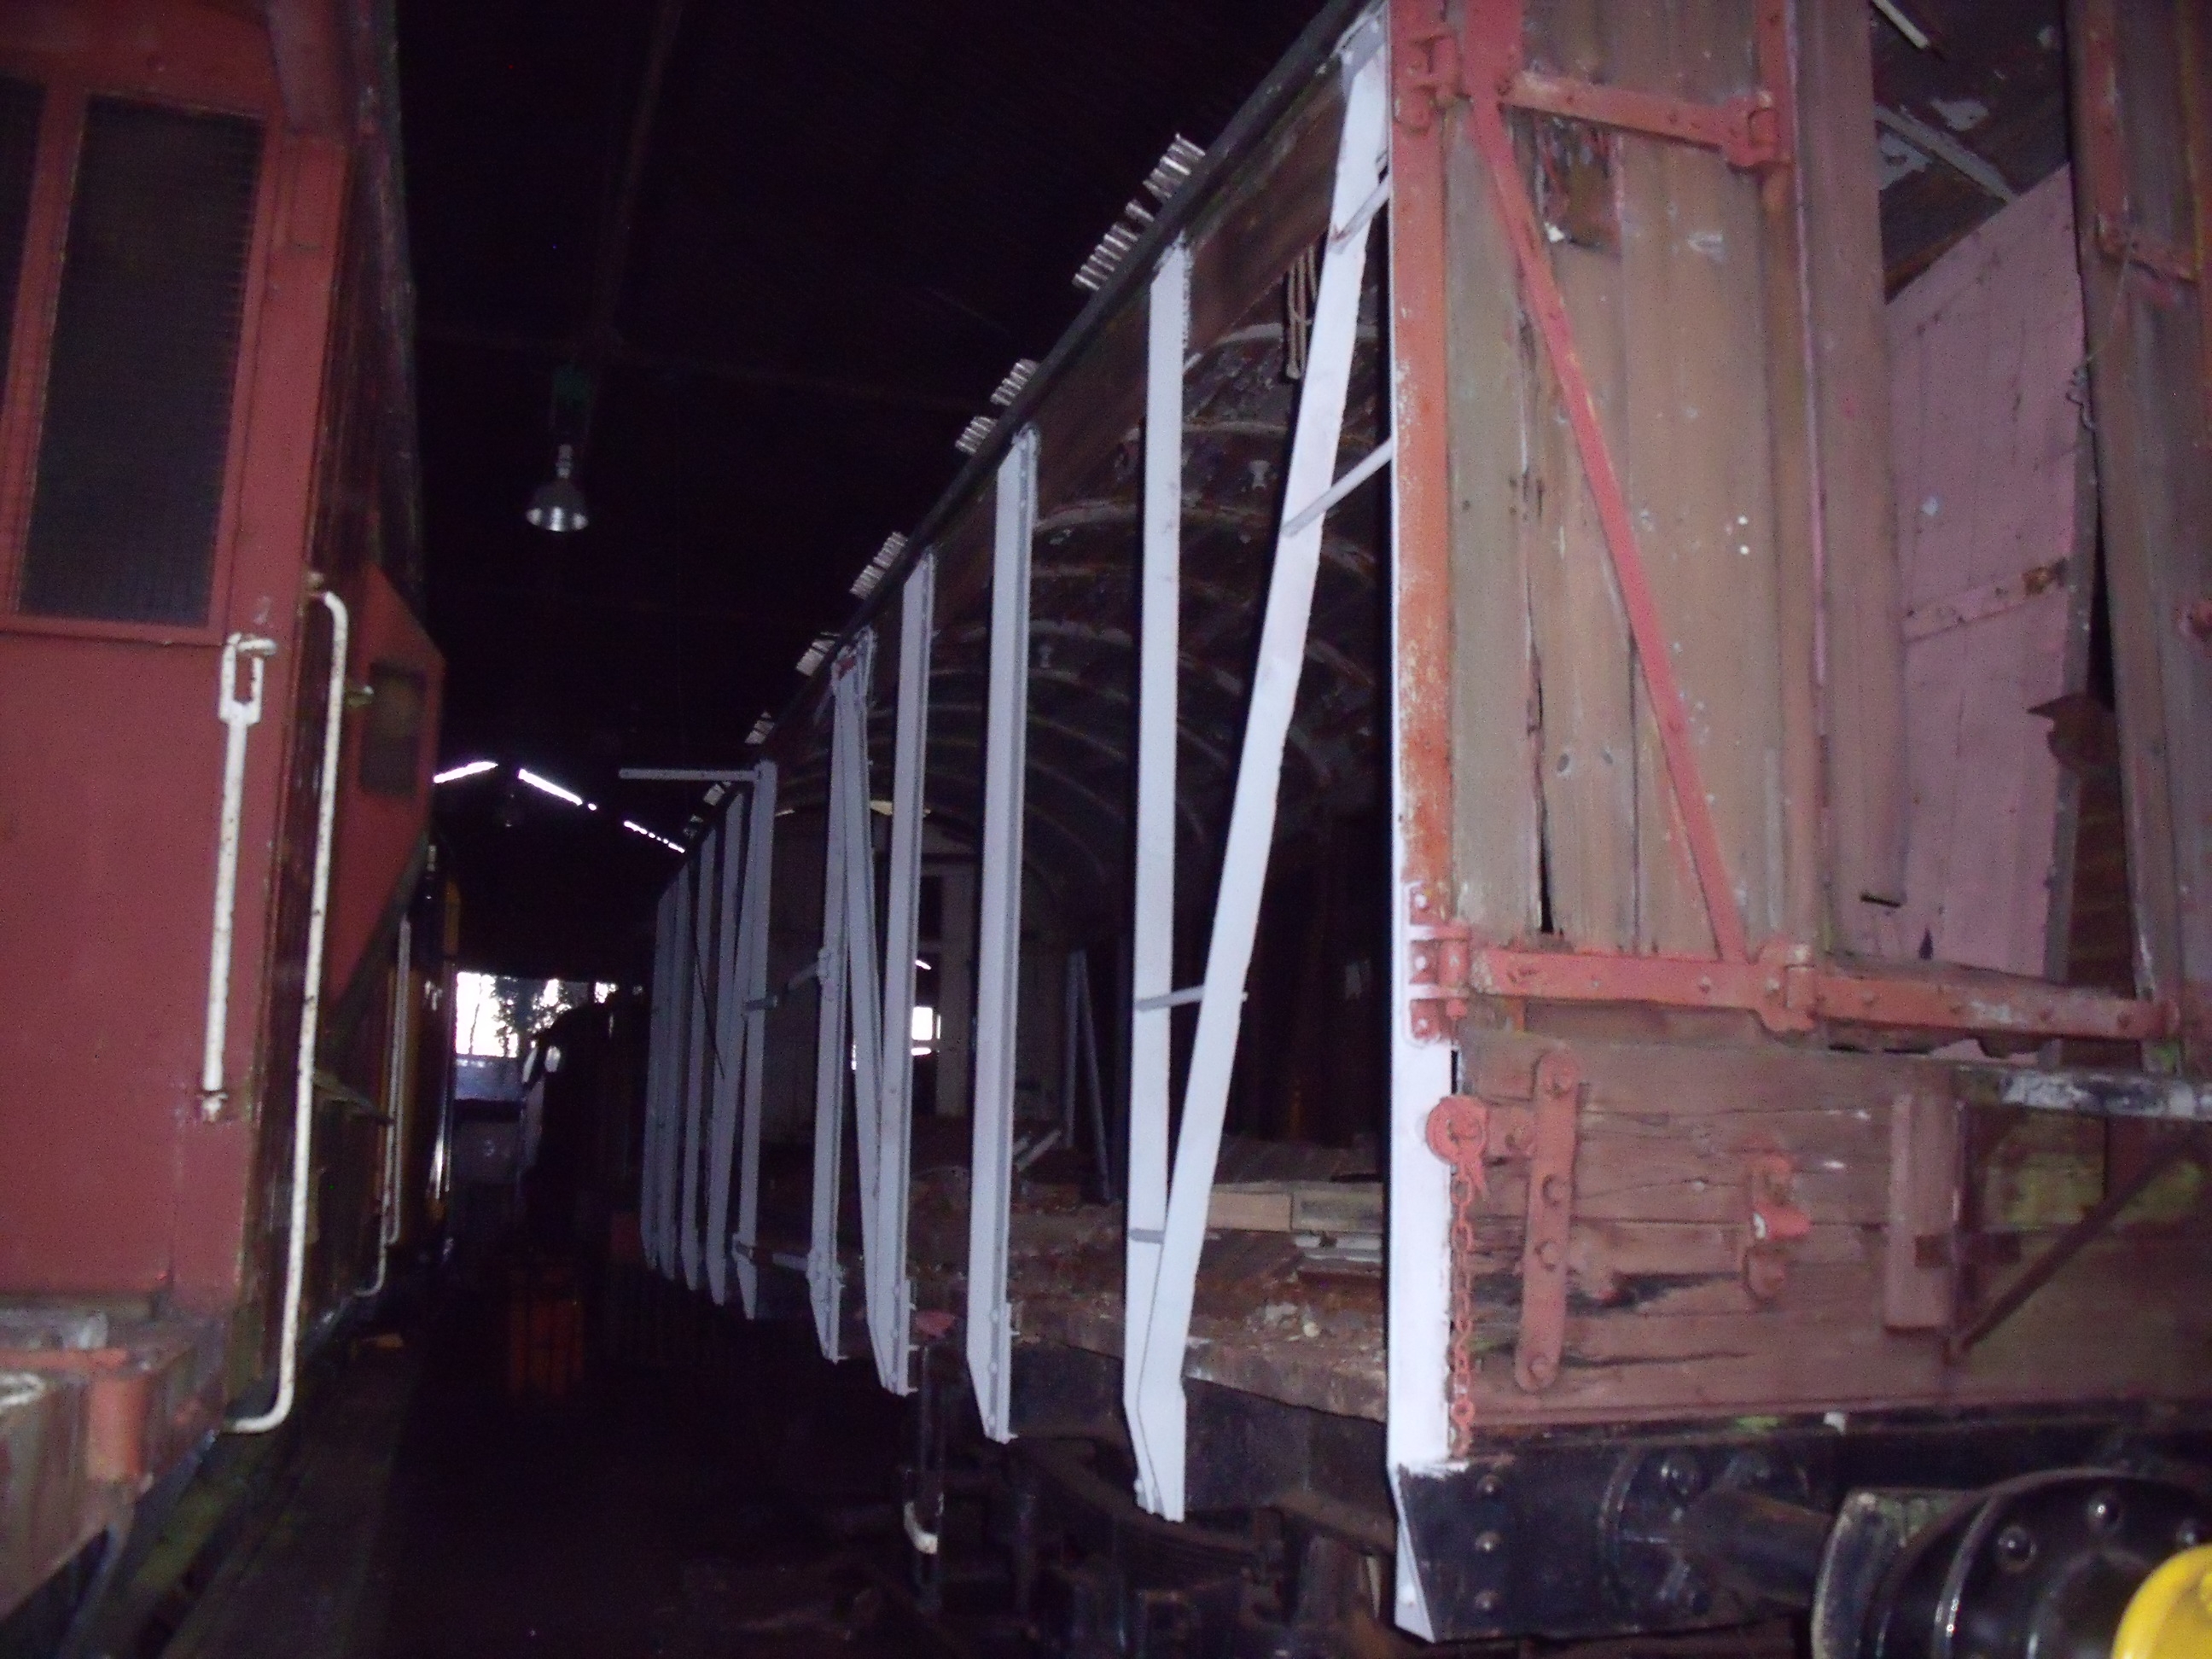
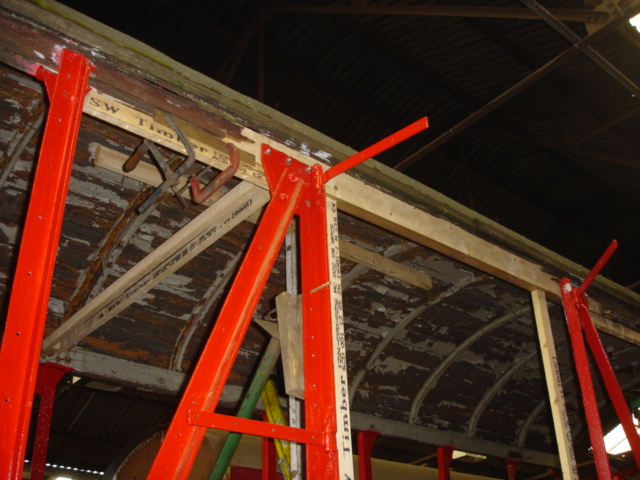
Extra vertical timbers have been added for temporary support, until we are able to finish bracing everything up. It may be that we start to put in the timber side cladding on this side as a priority, in order to fully complete the bracing to the interior before attempting to access the roof, which requires stripping and re-covering.


130721 NVR 021

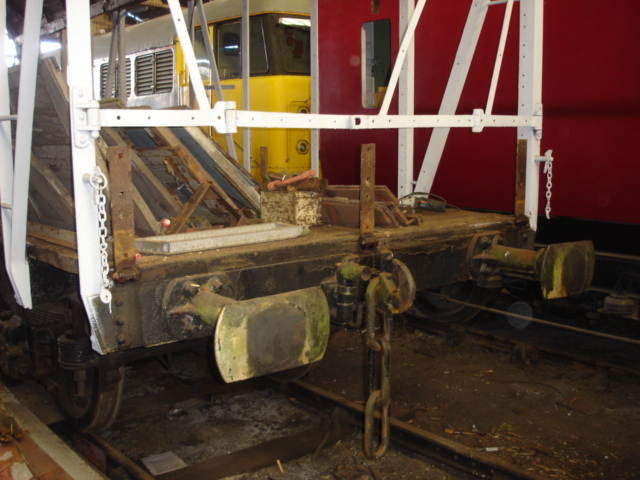
Three of us were on site today, so with the timber repairs mostly being only a two-man job, I had to find something else to do. Fortunately (unfortunately?) this van has plenty of work elsewhere required, so I spent some time stripping the eastern headstock as the old paint/rust was pretty lumpy and uneven.


130721 NVR 024

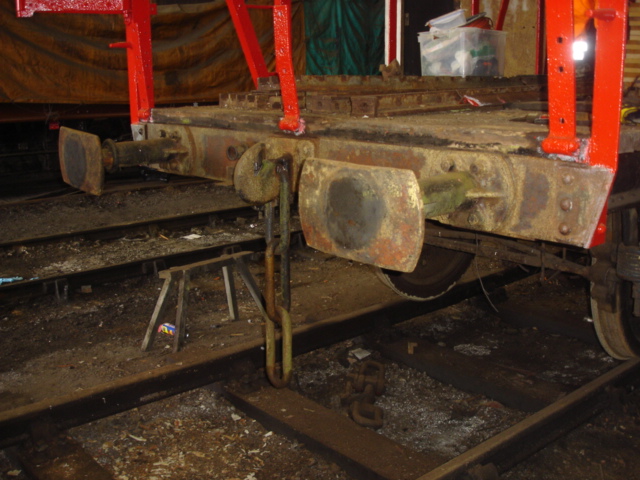
Headstock and buffers needle-gunned and wire-brushed…


130721 NVR 028

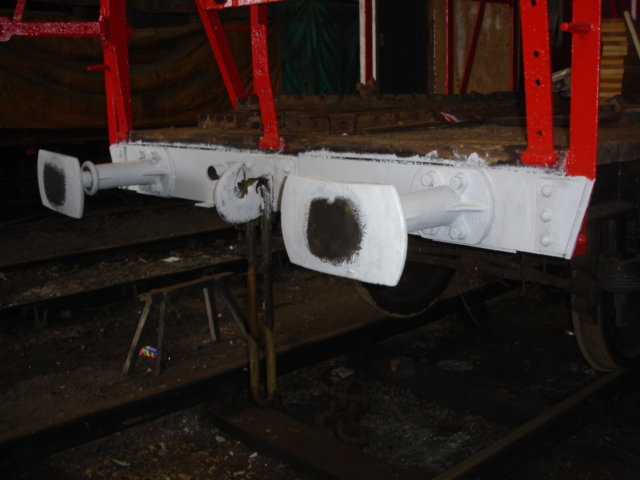
…and treated to a coat of anti-corrosive white primer.

Posted in Uncategorized | Comments Off on LMS CCT 37071: Part 12

LMS CCT 37071: Part 11

Image0760Just a brief update today: Topcoating to the body steelwork is now completed, another job off the ‘To Do’ list. (Photo courtesy of Philip Halstead).

Posted in Uncategorized | Comments Off on LMS CCT 37071: Part 11

LMS CCT 37071: Part 10

130615 NVR 026

After all the hours of hard work with little visible improvement, CCT 37071 has finally turned a corner with red topcoat now being applied to much of the body framework. About a third of the north side has been done…


130615 NVR 027

…and the south side has been completed, ready to receive the new timber bodywork once the roof has been stripped and re-canvassed.


130615 NVR 032

The first new timber has also gone in – the gap in the floor has now been filled with new planks, all drilled and bolted into place. Topcoating will continue to finish the body metalwork, then the next job is to build a stud partition wall across the van for its storage role, which will also help brace a weak point in the bodywork which requires strengthening before we go near the roof.

Posted in Uncategorized | Comments Off on LMS CCT 37071: Part 10

LMS CCT 37071: Part 9

Image0751Hot off the press are these photos from Philip, who has spent a day completing the ‘Metro Red’ undercoat to the remaining half of the steel body framework.


Image0754The undercoating is now complete, apart from the back of the framing hidden by the pile of old doors at the nearest corner of the van. Topcoat will follow shortly, and if all goes to plan, we are hoping to introduce the first of the new timber next week (to the floor).

Posted in Uncategorized | Comments Off on LMS CCT 37071: Part 9

LMS CCT 37071: Part 8

130526 NVR 003

Wagon Group volunteer Philip spent some time cleaning the rust out at the top of the side stanchions where the final boards had been removed a few weeks ago, and applied primer to these areas as well as the drop-down steelwork seen here above the buffer and coupling.

130526 NVR 010

With a decent day of warm weather, I was then able to apply the ‘Metro Red’ undercoat (more like salmon pink!) to half of the body structural steelwork, starting with the north-east corner…

130526 NVR 007

…and finishing with the south-western corner. One of the benefits of stripping all the timber is the ease of working and being able to use the floor of the wagon as a convenient working platform, rather than trying to work on ladders and scaffolding which manage to get in the way of what you are trying to work on! It also means we can do a really thorough job of derusting and painting, hopefully reducing the future effect of rust expansion behind the boards which had occurred on this wagon (and has on most of the others too). Anyway, it is good to see the first bit of colour emerge, even if it is only undercoat for now. The new timber is now on order, so it won’t be too much longer before the van starts coming together again, starting with the floor.

Posted in Uncategorized | Comments Off on LMS CCT 37071: Part 8

LMS CCT 37071: Part 7

130506 NVR 014After completing the removal of the final bodyside planks during the last working session, work began on the floor. A number of floorboards had been partially burned away at some point while the vehicle was in open storage, the damaged area seen here, and rot had created holes in the adjacent planks in the area of the side doors presumably due to water ingress through the doors over a long period of time. The whole lot had to come out, as this will be a high-traffic area once the vehicle is being used in its storage role.


130506 NVR 021Part of the anatomy of a ‘fitted’ goods van – the area of damaged floor planks came out surprisingly easily, with the sound floor boards being retained to each side of the door openings as seen here. To the top right of ‘the gap’ can be seen the vacuum cylinder and cross-shaft which controls the vacuum braking, while in the centre are the springs for the draw (coupling) hooks, the attached rods which can be glimpsed each running half the length of the van and connected to the drawhooks which protrude through the headstocks (buffer beams).


130506 NVR 028The drop-down sections of floor to the ends (which bridge the buffer area and allow motor vehicles to be loaded through the large end doors from an end loading dock) were also removed. Oil was liberally applied to the hinges to try to free them up a bit as they were very reluctant to move.


130506 NVR 029So there we have it – what should be the last bits of old timber to be removed from this van (assuming the roof timber is OK under the old roofing felt…) We now need to order the new timber so we can start putting it back together again – the rebuild should get more interesting from now on in!

Posted in Uncategorized | Comments Off on LMS CCT 37071: Part 7

LMS CCT 37071: Part 6

Recently our efforts have been concentrated on removing the final planks to the bodysides of LMS CCT 37071. We had been toying with keeping the four top timber planks in situ and making them as good as we could with filler and the like, as we had previously made an attempt to remove one on an earlier work session and found it near impossible to shift. However we gave the issue more thought and decided to have another go, as we have always been uncomfortable with the idea of using filler on timber that really is too far gone with rot. The photos below track progress:


130414 NVR 125Despite losing much of the morning to ‘admin’ at the railway, by (late) lunchtime we had managed to cut out and clean up the two top planks on the north side, seen here after removal had taken place. Rot on these planks was extensive, the surface crumbling away to reveal deep craters within the plank. The very top rail is generally serviceable, and should be able to dry out better now the planks below have been removed.


130414 NVR 127The planks on the drier south side had fared much better, but were still worth removing in order to replace them with new timber to get a really good final result when all painted up and on display. Here work resumes cutting out the bolts holding the planks in place.


130414 NVR 130With all the top planks now removed and the rust and scale that was lurking behind removed, we were able to call it a day with the knowledge that the floor will be the next job to tackle. Approximately 15-20 floor boards need to be removed and replaced, due to damage caused by rot and what appears to be a small fire started at some point while the van was in open storage. It is hoped that these floorboards will be the last timbers to be removed before new paint and timber can start going on, although this depends on the condition of the roof timbers currently underneath the roofing felt… fingers crossed!

Posted in Uncategorized | Comments Off on LMS CCT 37071: Part 6

New Arrivals!

130414 NVR 100A working volunteer and keen supporter of the Wagon Group has privately purchased two (Nos. 4726 and 4730) of the ex-Ministry of Defence 5-plank opens, that were offered in an auction of surplus MOD equipment. They touched down at NVR a couple of weeks ago and appear to be in incredibly good condition – which in some ways is a shame, as my sources indicate the other similar examples from the same auction went for scrap and were quickly given the chop… 4726 is seen above.


130414 NVR 115The interior of 4726. We were amazed at the generally good condition of the floors, which was something of a surprise!


130414 NVR 101No.4730 is next in line. This floor of this one has some holes, but nothing too serious that can’t be replaced. Otherwise it is in the same excellent condition requiring barely more than a wire brush and a repaint into 1950s BR ‘fitted’ bauxite livery, which both these wagons will receive in time – hopefully after completion of current restoration project, ex-LMS CCT 37071. Although these wagons were built for the MOD in 1963, they are in fact copies of the BR diag. 1/044 ‘Highfit’, although the original planked bodies have been rebuilt with steel sides in more recent times.

Posted in Uncategorized | Comments Off on New Arrivals!

LMS CCT 37071: Part 5

130317 NVR 033

The end doors have now been removed from both ends of the CCT, meaning the end of the stripping phase is in sight.


DSCF3495 - 20Mar13

A few days later, the ironwork for the end doors was de-rusted and primed.

Posted in Uncategorized | Comments Off on LMS CCT 37071: Part 5

LMS CCT 37071: Part 4

DSCF3371 (2) - CCT 13Feb13

Wagon Group volunteer Philip has continued his single-handed mission to clean up and prime the structural steel framing. Over two further working sessions he has progressed along the north side…


3Mar13-3

…and completed all the preparation and priming of all the metalwork exposed so far. Our next job will be to carefully remove the end doors seen in the photos above (which will be used as patterns to fabricate replacements), which will then enable the metalwork there to receive the same treatment. We can also now order the red undercoat and topcoat and start applying it to the freshly-primed metalwork. (All photos courtesy of Philip Halstead).

Posted in Uncategorized | Comments Off on LMS CCT 37071: Part 4

LMS CCT 37071: Part 3

130203 CCT-03

Wagon Group volunteer Philip has spent two successive working sessions cleaning up and priming the structural steelwork. By the end of the first day, he had cleaned up the rust and primed up to the central doors on the south side.


DSCF3366 - CCT 6Feb12

A week later, he cleaned and primed the remaining half…


DSCF3365 - CCT 6Feb12

…and made a start on the north side. He estimates another two working sessions will be required to complete preparation of the bodyside steelwork. (All photos courtesy of Philip Halstead).

Posted in Uncategorized | Comments Off on LMS CCT 37071: Part 3

LMS CCT 37071: Part 2

130126 NVR 014

After some time away from the railway over the Christmas and New Year period, we got reacquainted with ex-LMS CCT 37071 which continues to undergo stripping as the first stage of its cosmetic restoration.


130126 NVR 028

The remaining lower bodyside planks were removed, enabling access to properly clean and paint the structural steelwork – it is hoped this can be progressed in stages over the coming weeks and months. Note the remains of the end step (between the buffers), added for the “Octopussy” filming – this is to be retained on the vehicle for display.


130126 NVR 027

All the long side panels have now been stripped back to the bare framework, leaving only the doors to be removed.


130126 NVR 029

By early evening the side doors on the south side were also brought down safely.


130126 NVR 035

At close of play the second set of side doors had also been removed, leaving just the end doors to go. Note another filming modification, the horizontal tie-bars between the nearest diagonal stanchion, all of which will be retained on this restoration project.

Posted in Uncategorized | Comments Off on LMS CCT 37071: Part 2